Express框架源码阅读记录
前言
使用Express框架一年了,才想起来看源码,真是惭愧 O.o
下面是我阅读完Express框架后做的一些简单记录。
源码分析(个人理解)
框架布局
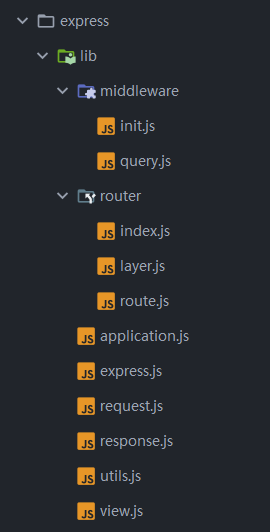
- middleware - 是默认添加的中间件
- router - 是用于添加路由的一些类
- applications.js - 添加app方法和属性
- express.js - 用于导出app、Router等
- request.js reponse.js - 用于添加req、res方法和属性
listen方法实现
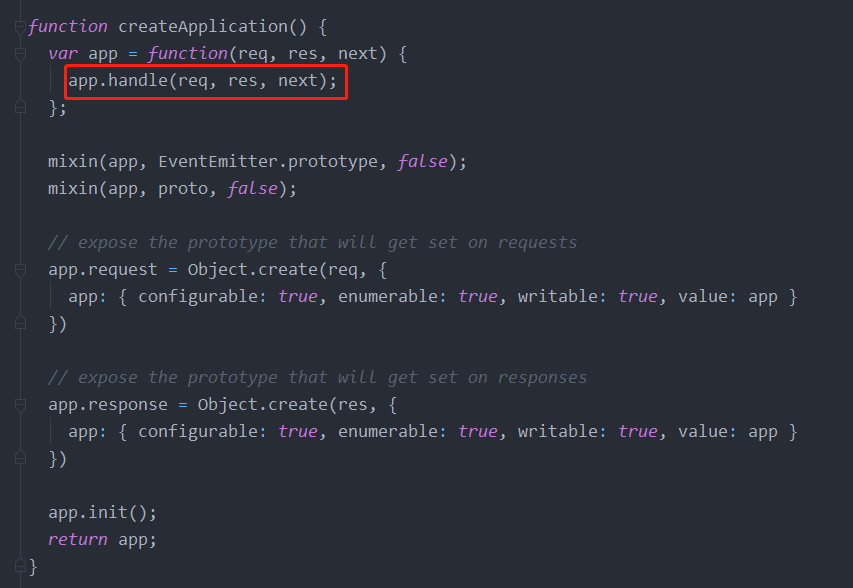
从下图就可以看出Express本质上就是在http基础上封装了一个回调函数作为http的请求和响应守卫的回调函数
在处理回调前添加一些自定义方法或属性,方便后面路由中处理(比如为req添加ip属性等)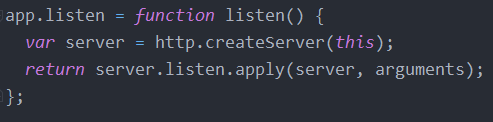
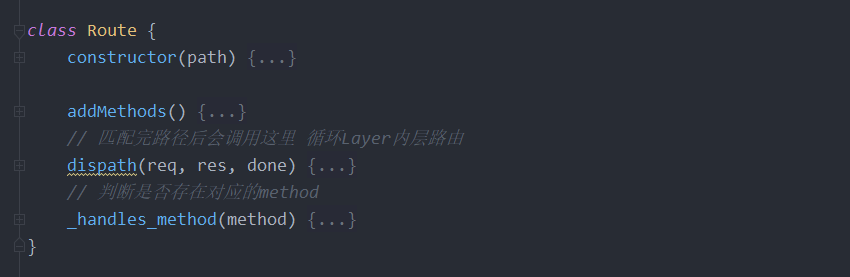
路由
添加路由时简单来说就两种情况
- 使用use添加: 添加的Layer可以后续匹配其它路由(可用于后续嵌套路由 Router),没有route属性
- 使用非use(get,post)添加: 添加的Layer只可以匹配路径相同的路由,且不可以后续匹配了, 有route属性
路径匹配的实现
- Express路径匹配是由 path-to-regexp包实现的,在Layer类中的构造方法和match类中可以找到

- match函数(截自源码)
从源码中可以看到,match主要实现了路径的匹配和提取param参数1
2
3
4
5
6
7
8
9
10
11
12
13
14
15
16
17
18
19
20
21
22
23
24
25
26
27
28
29
30
31
32
33
34
35
36
37
38
39
40
41
42
43
44
45
46
47
48
49
50
51
52
53
54
55
56/**
* Check if this route matches `path`, if so
* populate `.params`.
*
* @param {String} path
* @return {Boolean}
* @api private
*/
Layer.prototype.match = function match(path) {
var match
if (path != null) {
// fast path non-ending match for / (any path matches)
if (this.regexp.fast_slash) {
this.params = {}
this.path = ''
return true
}
// fast path for * (everything matched in a param)
if (this.regexp.fast_star) {
this.params = {'0': decode_param(path)}
this.path = path
return true
}
// match the path
match = this.regexp.exec(path)
}
if (!match) {
this.params = undefined;
this.path = undefined;
return false;
}
// store values
this.params = {};
this.path = match[0]
var keys = this.keys;
var params = this.params;
for (var i = 1; i < match.length; i++) {
var key = keys[i - 1];
var prop = key.name;
var val = decode_param(match[i])
if (val !== undefined || !(hasOwnProperty.call(params, prop))) {
params[prop] = val;
}
}
return true;
};
路径部分匹配后的路径处理(use 嵌套路由)
由router/index.js中trm_prefix函数实现
1 | function trim_prefix(layer, layerError, layerPath, path) { |
总结
- 读源码最好的方式就是从全局结构到局部细节(广度优先)
- 建议自己可以先仿照搭建一个简单的Express框架,再慢慢添加其它方法和属性, 添加的过程中就会慢慢发现其它属性和方法的意义何在。(可参考我的另一篇自定义Express框架篇)
- Express源码解读,网上有很多,在这里我就只记录了部分的
本博客所有文章除特别声明外,均采用 CC BY-NC-SA 4.0 许可协议。转载请注明来自 个人记录!
相关推荐

评论